Introduction to Domain and VPS Hosting
Connecting a domain to a virtual private server (VPS) is one of the most important steps for anyone looking to build an online presence. A VPS is much better than shared hosting. It provides dedicated resources, more control, and better performance.
Attaching a domain name to a VPS gives website owners an online identity. This is vital now, as accessibility is key.
Also, adding a domain to a VPS lets the user better manage their web hosting and increases customization and scalability. A VPS has many advantages. It lets you install needed hardware and software, adjust security settings, and optimize performance. It avoids many of the limitations of shared hosting.
In addition, a site’s credibility is greatly improved when a domain is connected to a VPS. This automatically portrays a sense of professionalism. It also makes sites easy to rank, so potential actors or readers can access them easily.
Whether you run a blog, corporate Site, or e-commerce platform, you must understand this connection. Users need to find you on the web in seconds without wasting time.
Knowing the ways to connect your domain to the VPS server will help you decide the best approach for your case. This information enables you to manage websites and adapt as your activities grow.
What is a Domain and VPS
A domain is a unique web address that defines a web site. It allows visitors to access the site’s content without having to memorize the site’s complicated IP address. A domain could be “example.com” to access a specific site on the Internet, while an IP Address may take a numeric form such as “192.168.1.1.” Additionally, domain names are usually formed with a second level domain with (the name) and a top level domain or TLD such as .com, .org, etc. These classify and name websites in global internet databases.
A VPS is a Virtual Private Server. It’s a type of hosting that guarantees users isolated resources on a single physical server. It allows multiple virtual servers on one machine to work autonomously. This is better than shared hosting. It gives users more power and options and is more efficient. This makes VPS a top choice for firms and developers. They need high customization and extra security for their websites.
Domains are the web addresses of different sites. VPS stands for “Virtual Private Server.” It creates a storage space to host a site. One must know both to create an online perspective.
Security-First Hosting for Businesses
From DNS to disaster recovery—ARZ Host has your back.
Click HerePrerequisites for Pointing a Domain to a VPS
The prerequisites below outline the steps to link a domain to your VPS. They ensure everything is in order before setup.
Domain Registration Process
The first thing you will need to do to add a domain to your VPS is to register a domain name with a domain registrar. Here are the important steps to buy a domain:
- Choose a reliable registrar.
- Check with the Registrar’s Search Tool and ensure that your domain name is open.
- On finding an available domain, add it to your cart.
- Complete the personal information to be registered including your name, address, and contact details.
- Lastly, check out and make your payment. You may also have options for extra services, such as email hosting and privacy protection.
WHOIS Guard for Privacy Protection
When you register a domain, your details likely appear in the WHOIS Database. Therefore, you ought to secure your privacy by opting for WHOIS Guard or other similar options offered by the registrars.
The service aims to replace a person’s information in the WHOIS database with general contact information. This minimizes unnecessary contact with the protected individual and enhances the protection of their personal address.
VPS Setup
In order to bring your VPS online, one usually needs to do the following:
- Select a VPS Provider: Select a good host that offers the VPS services that are satisfactory to you.
- Choose Your Plan: Choose a VPS Plan based on your resource requirements (CPU, RAM, storage).
- Set Up Your Server: When setting up the server, you may have the option to choose an OS (usually Linux) and install any software that does not have control panels.
- After provisioning the server, it is time to access it using SSH. You must use the IP address provided, along with the username and password provided by your host.
Now you will be ready to finish setting up your VPS by updating all server software and adding a firewall for security. Now you will be ready for the next step, which is linking your domain name to your VPS and managing your online presence.

Methods to Point a Domain to a VPS: Step-By-Step Guide
There are various Methods for adding the domain to your VPS, such as:
- Using A Records
- Using AAAA Records
- Using Custom Nameservers
- Using Cloudflare for DNS Management
Method 1: Using A Records for Domain Pointing
An A record, which stands for Address Record, is a very important component of DNS.It is used to map (link) a domain name with its IPv4 address. This mapping enables users to use easy to remember domain names that are readable rather than remembering the numerical IP address which generally consists of 3 sets of numbers between 1 and 255 separated by dots.
When one user enters a domain name in the search box of a web browser the server requests the database to request information to this domain name. In case the original server is unable to associate the domain name with an IP address, it will examine successive server requests until the suitable IP address is located.
In the absence of A record, no domain can be attributed to an internet address and thus, it is important to generate an A record in order to have the domain in fact to be connected and utilized as a means of address to the site.
Step-by-Step Guide:
Here’s a step-by-step guide to adding the domain to your VPS using A record:
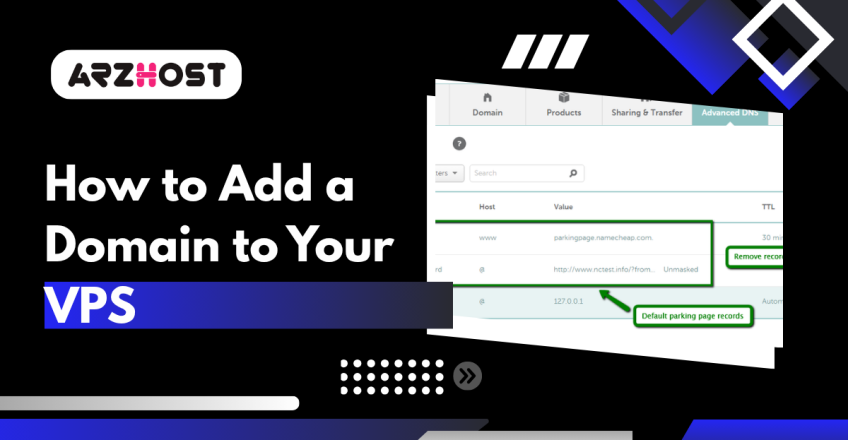
- Access Your DNS Management Dashboard: Log in to your registrar website. Then go to the DNS management area.
- Look for Existing A Records: Look for any A records to your domain. If they are incorrect IP addresses, you may need to change or delete them.
- Add a New A Record:
- Name Field: If you are pointing to the root domain, leave this field blank or enter “@” (your registrar may differ). If it is a subdomain, then enter the desired subdomain name, (such as “www” or “blog”)
- Type: Choose from the record type, choose “A”
- Address Field: Change the IP address to your VPS’s IP Address.
- TTL (Time to Live): The setting for TTL, will tell the DNS when it is time to refresh the information. A typical value is, 14400 seconds or 4 hours etc.
- Save your changes: Once, you have added the A record information, make sure you save, to update your DNS record.
- Verify the A Record: You can use dig, use an online checker, to verify that your A record you added is the VPS address (IP Address).
Method 2: Using AAAA Records for IPv6
AAAA record or Quad-A record is a type of DNS record which links the domain names to IPv6 address, allowing connection to the internet using the new Internet Protocol version 6 (IPv6) addressing scheme, which has a far larger address space than the old standard equivalent, the IPv4.
A AAAA record should be set in case your web site or service should be accessible via IPv6. This will allow users with IPv6 addresses to reach your Site without difficulty. AAAA records associate domain names with IPv6 addresses. AAAA records are particularly important for residential use as the Internet pivots to IPv6 addressing.
Step-by-step Guide:
Here is step-by-step process for adding the domain to your VPS with AAAA Records:
- Access Your Domain Registrar: First, log into your account with your domain registrar.
- Navigate to DNS Management: Find the section for managing DNS records. This may be labeled as “DNS Settings,” “Manage DNS,” or something similar.
- Add a New AAAA Record
- Select the add new record option.
- Select AAAAA as the record type drop.
- Enter Record Details
- Name/Hostname: You may enter the root domain using the use of the @ character, or add a subdomain (e.g. www).
- Value/Destination: Type in the IPv6 address of your server
- TTL: Select a Time To Live (TTL). The default value is 3600 seconds (1 hour) but you can leave it as default when you are not certain.
- Save Changes: Once you have completed all the fields save it by clicking the button which is labeled save, add record or any other similar label.
- Check DNS Propagation: It is possible that it will take up to a few minutes up to 48 hours to propagate. To determine whether or not yours has been published you can use a site such as WhatsMyDNS.net.
- Multiple AAAA records: Load balancing Multiple server(s) can be used to serve a request with a single hostname, by having two AAAA records.
- Coexistence with A records: It is widely thought of as a good idea to have both an A Record and AAAA to the same domain name, where the user can access your websites in either IPV4 or IPV6.
Related Article: What Is a Fully Qualified Domain Name
Method 3: Using Custom Nameservers for Domain Management
Custom nameservers are DNS servers. They update your web host’s default nameservers to have your own domain with the custom nameservers.
For example, if you were to own example.com, you’d create nameservers ns1.example.com and ns2.example.com. This design helps businesses. It boosts brand awareness and looks professional, and it also allows for better DNS management.
Using custom nameservers can reduce a lot of friction when switching to another host. Customers do not need to change their nameserver settings to use your service, nor share information from your competitor, which creates trust.
Step-by-Step Guide
Here is a guide on how to add the domain to your VPS utilizing Custom nameservers:
- Set Up Records for Custom Nameservers
- Access your VPS control panel/DNs management interface.
- Go to the DNS settings or the Zone Editor.
- Create two A records for your custom nameservers:
- Record 1:
- Name: ns1.example.com
- Type: A
- Value: Your VPS IP address
- Record 2:
- Name: ns2.example.com
- Type: A
- Value: Your VPS IP address
- Register Custom Nameservers with Your Domain Registrar
- Log in to your domain registrar account.
- Find the section for registering custom nameservers. It may be under “DNS Management” or “Advanced DNS.”
- Register your custom nameservers:
- For ns1.example.com, enter the corresponding IP address.
- For ns2.example.com, enter the same IP address or a different one if applicable.
- Assign Custom Nameservers to Your Domain
- Select a change nameservers option in the domain management section of your registrar.
- Choose the option of using your own nameservers and put-in:
- ns1.example.com
- ns2.example.com
- Verify Configuration
- DNS changes can propagate after a long time (up to 24 hours) after you save your changes.
- Test whether your domain name is resolvable to the new custom nameservers using such tools as WhatsMyDNS.net.
- Test Your Setup
- To check whether the custom nameservers are operational, you can ping them on a command prompt:
- ping ns1.example.com
- ping ns2.example.com
- Alternatively, the dig command can be used:
- dig ns1.example.com
- dig ns2.example.com
Method 4: Using Cloudflare for Advanced DNS Management
Cloudflare is a worldwide service provider for Content Delivery Networks (CDN), internet security, and DNS services. Cloudflare primarily serves as a reverse proxy for websites, which manages the connections a user makes to the web server to optimize the traffic.
Cloudflare is able to manage your DNS records with little to no downtime. Cloudflare’s tech infrastructure is a source of reliability. The capabilities include: scanning for missing DNS records; a flexible DNS caching system; and security features.
Step-by-Step Guide
Here’s a step-by-step guide for adding the domain to your VPS using Cloudflare:
- Add a Cloudflare Account: In case you do not have an account, visit the Cloudflare site and create an account with it.
- Add Your Domain: Click on Add Site when you are logged in. Put in your domain name and press Add.
- Choose a Plan: Select a plan that fits your needs.
- The free plan is often sufficient for essential use. Click Confirm Plan.
- Review DNS Records
- Cloudflare will automatically scan for existing DNS records associated with your domain. Go and check these records to ensure that they are correct.
- Make sure that the A record points to your IP of vps. When it does not point to it or in case the A record is not present, it will be possible to add it or make it later.
- Copy Cloudflare Nameservers
- After confirming the records, Cloudflare will give you two nameservers.
- It is important that you copy these nameservers as you will require it in the following step.
- Change Nameservers at Your Domain Registrar
- Log in to your domain registrar account.
- Find the DNS management section for your domain.
- Swap out the nameservers with the new nameservers provided by Cloudflare.
- Save the changes.
- Configure DNS Records in Cloudflare
- Go back to the Cloudflare dashboard.
- Go to the DNS tab for your domain.
- Here you can create or modify DNS records.
- In order to add a record, select Add Record.
- For the record Type: select A, CNAME, etc.
- Then enter the appropriate fields, like Name and Content etc., and set TTL if you like.
- Verify Changes
The propagation of the DNS changes can take time (as long as 48 hours) before the changes are completely propagated and can be detected in a command such as dig or in a utility like WhatsMyDNS.net or IsMyWebsiteUp.com. You might also like to verify that your domain is properly resolving to Cloudflare with the help of a command dig or by visiting whatsmydns.net.
Enable Additional Features (Optional): Check out some of the features Cloudflare has to offer. These will include the SSL/TLS settings for secure connection, firewall rules for increased security and caching settings to improve performance.
Verifying Domain Propagation
After you update your domain name server, expect some delay as the changes spread across the web. This applies if you change an IP address or DNS records. The above activity is what we call DNS propagation.
It ranges between a couple of minutes to even 48 hours and above. We can use several tools to check the status of the domain. We can confirm it is pointing to the VPS as intended.
Tools and Methods for Checking Domain Propagation
You can use different tools and methods to check your domain propagation:
- DNS Checker: This tool checks DNS propagation using 100+ global DNS servers. It visually represents the propagation status on a map. This makes it easy to identify regional variations.
- WhatsMyDNS: It is a free tool. It checks if your updated DNS records have been propagated globally. It provides real-time results from multiple servers.
- PrePostSEO DNS Propagation Checker: This tool checks DNS records against servers worldwide. It displays the results in a table.
- Command Line Tools: You can use command line tools to check DNS records from your computer.
- nslookup (Windows): nslookup your_domain_name
- dig (macOS/Linux): dig A your_domain_name
- Ping Command: You have the option of using the ping command. You will be able to see the IP address that your domain resolves to, and ensure it resolves to your VPS.
- ping your_domain_name
Start hosting smarter. ARZ Host is built for speed
Dedicated Resources, Affordable Price: Sign Up for VPS Hosting.
Click HereConclusion
To create an official website, the first step is connecting the domain name with the VPS. The availability of the domain name with VPS also gives it superior control over the site configuration and further customization, exchangeability and performance when compared to shared hosting facilities.
VPS allows you to build a secure, individualized environment that is capable of being completely useful to you.
The performance of VPS will not be negatively impacted regardless of the customizations and changes made to the website.
There are many ways to point a domain name to a VPS. Some standard methods of this include using A Records, AAAA Records, custom nameservers, or using DNS services like Cloudflare. Each of these options has their advantages, based on your technical needs or other criteria, and allows you to decide which is a better method.
For instance, using Cloudflare enhances security and performance. Custom nameservers help with branding your business and add flexibility to your DNS management.
Once you change any DNS records, you will want to follow up by checking the propagation status of the new records. This will confirm your domain name is pointing in the proper direction to link with your VPS. There are several tools that can help track this process in real time. In summary, this set of steps establishes a secure and efficient link from VPS to the domain process that contributes to site accessibility, reliability, and trust.
In case you have a personal blog, business site or a site where you sell products, you must associate your domain name with VPS. This is essential in making sure that your Site performs better and you also enhance your presence in the online world.
For reliable and valuable hosting solutions, visit ARZ Host.
FAQs (Frequently Asked Questions)
What is the average DNS propagation time?
It is good to keep in mind that DNS changes do take some time. It can take from a couple minutes up to 48 hours for complete propagation in all networks across the Internet. The propagation time depends on some factors such as TTL (Time To Live) settings, and how quickly surrounding DNS servers update their caches around the globe.
What is the difference between A Records and AAAA Records?
An A Record points a domain to an IPv4 IP Address. An AAAA Record points a domain to an IPv6 IP Address. IPv4 is a 32-bit address space. IPv6 is 128 bit space. It has a much larger and diverse collection of unique addresses. You may have both Records for your domain if you would like it accessible to IPv4 and IPv6.
What does it mean to use custom nameservers and why would I want them?
Custom nameservers are DNS servers that use your domain name. They are not the default ones provided by the hosting company. An illustration is that nameservers may be e.g. ns1. example.com and ns2. example.com. This is also better in terms of branding since you do not have to use the default nameservers. It also improves on security and control as well as reliability of DNS management.
Could I use Cloudflare to provide my DNS management of my domain over a VPS?
Yes, Cloudflare is one of the best DNS administration bots for your VPS. It even has security features, like DDoS protection. It also has performance boosts, like caching and CDN services. Also, simple, intuitive DNS management tools are another reason for Cloudflare’s popularity for private and business sites.
What is DNS propagation and why is it of interest?
DNS propagation is the duration by which DNS changes can be propagated on the Internet. An update includes changes to a domain’s IP address or nameserver settings. During this propagation window or propagation stage, some individuals will see out-of-date system information, and others may see the new information. That amounts to successful propagation. Also, you should keep your domain pointing to your VPS or server.
What am I supposed to do in order to ensure that my domain is correctly pointing to my VPS?
To define whether your domain is pointing toward the proper VPS, there are a number of tools that you can utilize. Monitoring tools will be available through almost every VPS’ domain management software. Other popular tools include WhatsMyDNS.net, DNS Check tool, or command-line tools. Examples of Command-line tools include nslookup (Windows) or dig (Linux or MacOS). The tools primarily allow one to test how the DNS propagation is going on, and also ensure that the resolution of their domain name into a relevant IP address is achievable.
Can one connect various domains to the same VPS?
Yes, one can connect two or more domains with the same VPS through virtual hosts. Another way to do this is to set up your web server (e.g. Apache or Nginx) to serve other sites when a domain requested is sent to your VPS. This is used in cases where a user is running numerous sites on a single VPS.
Read More: