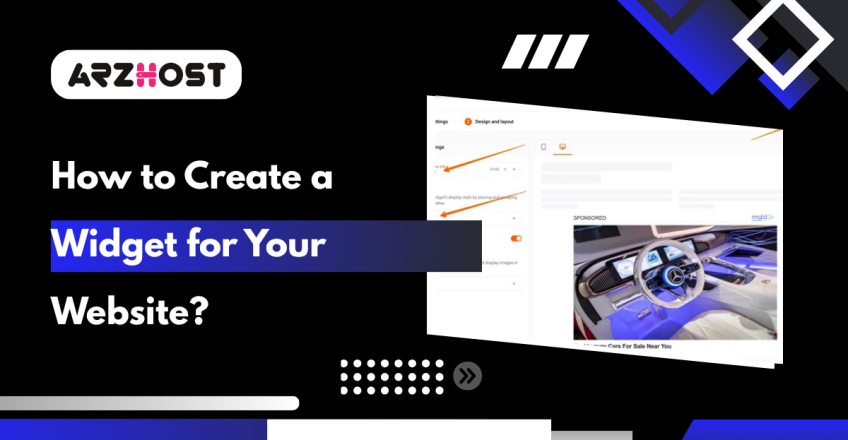
Introduction: Building Custom Widgets – A Step-by-Step Process
With the correct direction, if you create a widget for your website, it can be a satisfying and manageable activity even though it initially seems overwhelming. Small programs or gadgets called widgets improve the user experience on your website by performing particular tasks.
Widgets provide functionality and engagement to any display, be it a social media feed, a live chat box, or weather predictions.
You can make your own custom WordPress widget; did you know that? WordPress users can manually create customized widgets, even if a ton of extra widgets are included with themes and plugins.
You just need to know the fundamentals of WordPress and PHP, so it’s not a difficult procedure.
So, let’s get started right away!
What Are WordPress Widgets?
With WordPress Widgets, you can easily add new features to your website using an intuitive drag-and-drop interface. WordPress comes with several widgets by default. They work with all WordPress themes and offer you basic utility functions.
But occasionally, the functions you need to have done cannot be completed by those ordinary widgets. Searching for plugins that provide the needed functionality is your best bet. Regretfully, you may discover that not even third-party plugins can satisfy your needs.
Here’s a breakdown of what widgets are and how they work:
- Modular elements: Imagine widgets as building blocks, each providing a specific function. There are widgets for displaying recent posts, adding a search bar, showcasing categories, integrating social media links, and much more.
- Designated areas: These building blocks fit into predefined areas of your website called widget areas. These are typically found on the sidebar and footer, but some themes may offer widget areas in the header or other locations.
- Easy to use: The beauty of widgets is that you don’t need coding knowledge to use them. You can simply drag and drop them into the desired widget area and customize their settings through a user-friendly interface.
- Default widgets: WordPress comes with a set of default widgets that cover many common needs. These include widgets for displaying recent posts, categories, calendars, and more.
- Plugin widgets: Many plugins also add their own widgets, giving you even more functionality to extend your site’s capabilities.
Without knowing any code, widgets essentially allow you to improve the user experience and customize your WordPress website.
Luckily, you can make a custom WordPress widget. Just remember that it must be constructed from the ground up, allowing you to adjust your own widget to your exact specifications.
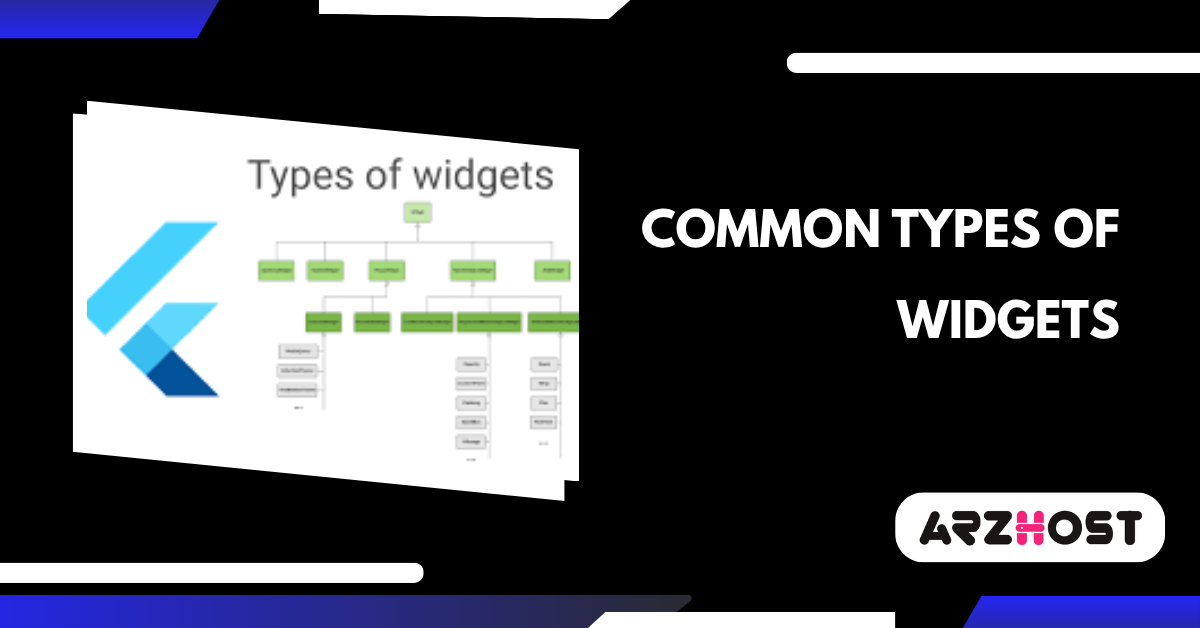
Common Types of Widgets
Widgets are mini-applications that can be embedded into a user interface (UI) to perform specific functions or display information. They come in a variety of types, each serving a different purpose. Here are some of the most common types of widgets:

1: Informational Widgets:
These widgets display data or content to the user. Examples include:
- Labels: Text labels that display information.
- Icons: Small images that represent a concept or action.
- Badges: Small notifications that display unread messages, alerts, or other updates.
- Progress bars: Linear or circular indicators that show the progress of an operation.
- Lists: Ordered or unordered collections of text items.
2: Input Widgets:
These widgets allow users to input data or interact with the UI. Examples include:
- Buttons: Elements that trigger an action when clicked.
- Text fields: Areas where users can enter text.
- Checkboxes: Buttons that can be toggled on or off to select an option.
- Radio buttons: A group of buttons where only one can be selected at a time.
- Sliders: Bars that allow users to select a value from a range.
- Dropdowns: Menus that allow users to select an option from a list.
3: Container Widgets:
These widgets group other widgets together to create a more organized layout. Examples include:
- Frames: Rectangular areas that can contain other widgets.
- Grids: Layouts that arrange widgets in rows and columns.
- Stacks: Layouts that arrange widgets on top of each other.
4: Navigation Widgets:
These widgets help users navigate within an application or website. Examples include:
- Tabs: Horizontal or vertical bars that allow users to switch between different views.
- Breadcrumbs: A visual indicator of the user’s current location within a hierarchical structure.
- Paginators: Controls that allow users to navigate through a large dataset in pages.
The type of widget you choose will depend on the specific needs of your website or app. Widgets can be a great way to add functionality and value to your website or app, and they can also help to improve user engagement.
Where to Begin When Creating a Custom WordPress Widget
An attractive and useful technique to improve a website or application’s usability is to create a custom widget. Knowing the basics is essential whether your goal is to integrate a third-party service, add a new feature to a content management system, or just build a distinctive user interface piece.
Here is a step-by-step tutorial to help you get started with making your own widgets.
- Understanding the Requirements and Planning: The first step in creating a custom widget is to thoroughly understand the requirements. What problem is the widget intended to solve? Who is the target audience, and how will they interact with it? Once you have a clear understanding, sketch out the widget’s design and functionality. Planning is essential to ensure that you have a clear roadmap and that you don’t miss any critical features or details during the development process.
- Choosing the Right Tools and Technologies: The tools and technologies you use will depend on the platform for which you’re developing the widget. For web applications, HTML, CSS, and JavaScript are fundamental. If you are working within a specific framework like React, Angular, or Vue.js, familiarize yourself with the relevant libraries and components. For WordPress, you might need PHP and WordPress-specific functions. Ensure you have a solid understanding of the tools and technologies you plan to use before you start coding.
- Setting Up the Development Environment: Before you begin coding, set up your development environment. This might include installing a code editor, setting up version control with Git, and configuring a local development server. If you’re working with Git, understanding setting up Git upstream can streamline collaboration by keeping your branches in sync. For web widgets, you might also want to set up a build process using tools like Web pack or Gulp to manage dependencies and automate tasks such as minification and transpilation.
- Writing the Code: With your environment set up, you can start writing the code for your custom widget. Begin by creating a basic structure and then incrementally add functionality. Keep your code organized and modular to make it easier to manage and debug. Write clean, readable code and comment where necessary to explain complex logic. Testing as you go can help catch and fix bugs early in the development process.
- Testing and Debugging: Once your widget is functional, thoroughly test it to ensure it works as expected across different browsers and devices. Look out for any bugs or performance issues and address them promptly. Use debugging tools and browser developer tools to identify and fix issues. If your widget interacts with external APIs or services, test these integrations extensively to ensure reliability.
- Deployment and Maintenance: After testing, you can deploy your widget to the live environment. Ensure you follow best practices for deployment to minimize downtime and avoid disrupting users. Once deployed, monitor the widget for any issues and be prepared to update and maintain it. User feedback can be invaluable for identifying areas for improvement and ensuring the widget continues to meet user needs.
By following these steps, you can create a widget for your website that is not only functional but also enhances the user experience.
Remember that creating a custom widget is an iterative process that involves planning, coding, testing, and maintenance. Each step is crucial to delivering a high-quality widget that adds value to your website or application.
How to Create a Widget for Your WordPress Website: 6 Quick Steps
Creating custom widgets for your website can significantly enhance its functionality and user experience. In this detailed guide, we’ll walk you through the process of creating a custom widget for WordPress by extending the WP_Widget class.
We’ll cover each step, including how to add essential methods like __construct (), widget (), form (), update (), and finally, how to register your custom widget.
1: Extending the WP_Widget Class
The first step in creating a custom widget is to extend the WP_Widget class. This class provides a framework for creating widgets that can be used in your WordPress site. Here’s how you can get started:
class My_Custom_Widget extends WP_Widget {
// Constructor
function __construct () {
parent: __construct (
‘My_custom_widget’, // Base ID
_ (‘My Custom Widget’, ‘text domain’), // Name
Array (‘description’ => ‘A Custom Widget’, ‘text domain’),) // Args
);
}
// Output the content of the widget
public function widget ($args, $instance) {
echo $args[‘before widget’];
if (! empty($instance[‘title’])) {
echo $args [‘before title’]. apply filters (‘widget title’, $instance[‘title’]). $args [‘after title’];
}
echo _ (‘Hello, World!’, ‘text domain’); // Widget content
echo $args [‘after widget’];
}
// Output the widget settings form in admin
public function form($instance) {
$title =! empty($instance[‘title’])? $instance[‘title’]: __ (‘New title’, ‘text domain’);
?>
<p>
<label for=”<?php echo $this->get_field_id(‘title’)?>”><?php _e(‘Title:’)?></label>
<input class=”wide fat” id=”<?php echo $this->get_field_id(‘title’) ;>” name=”<?php echo $this->get_field_name(‘title’) ;>” type=”text” value=”<?php echo esc_attr($title) ;>”>
</p>
<?php
}
// Update widget settings
public function update($new_instance, $old_instance) {
$instance = array();
$instance[‘title’] = (!empty($new_instance[‘title’])) ? strip_tags($new_instance[‘title’]) : ”;
return $instance;
}
}
2: Adding the __construct() Method
The __construct () method is the constructor of your widget class. This method initializes your widget by setting its ID, name, and description. Here’s a breakdown of the constructor method:
function __construct () {
parent: __construct ()
‘My_custom_widget’, // Base ID
_ (‘My Custom Widget’, ‘text domain’), // Name
Array (‘description’ => __ (‘A Custom Widget’, ‘text domain’),) // Args
);
}
- Base ID: A unique identifier for your widget.
- Name: The name of your widget as it will appear in the WordPress admin area.
- Args: An array of options to describe your widget, such as its description.
3: Adding the widget() Method
The widget () method outputs the content of your widget on the front end of your website. Here’s the code for the widget () method:
public function widget ($args, $instance) {
echo $args [‘before widget’];
if (! empty ($instance[‘title’])) {
echo $args [‘before title’]. apply filters (‘widget title’, $instance[‘title’]). $args [‘after title’];
}
echo __ (‘Hello, World!’, ‘text domain’); // Widget content
echo $args [‘after widget’];
}
$args: An array of arguments that define the widget’s appearance, such as before widget, before title, after title, and after widget.
$instance: An array of the widget’s settings.
4: Adding the form () Method
The form () method outputs the widget settings form in the WordPress admin area. Here’s the code for the form () method:
public function form($instance) {
$title =! empty ($instance[‘title’])? $instance[‘title’]: __(‘New title’, ‘text domain’);
?>
<p>
<label for=”<?php echo $this->get_field_id(‘title’)?>”><?php _e(‘Title:’)?></label>
<input class=”wide fat” id=”<?php echo $this->get_field_id(‘title’)?>” name=”<?php echo $this->get_field_name(‘title’)?>” type=”text” value=”<?php echo esc_attr($title) ;>”>
</p>
<?php
}
$instance: An array of the widget’s settings.
This method generates a form with a single field for the widget’s title. The get_field_id () and get_field_name () methods generate unique field IDs and names.
5: Adding the update () Method
The update () method processes the widget options to be saved. Here’s the code for the update () method:
public function update ($new instance, $old instance) {
$instance = array ();
$instance[‘title’] = (! empty ($new instance[‘title’]))? strip tags ($new instance[‘title’]): ”;
return $instance;
}
$new instance: The new settings for this instance.
$old instance: The previous settings for this instance.
This method sanitizes the input by stripping HTML tags from the title.
6: Registering WordPress Custom Widget
Finally, you need to register your custom widget with WordPress. You can do this by adding the following code to your theme’s functions.php file:
function register_my_custom_widget () {
register_widget(‘My_Custom_Widget’);
}
add_action (‘widgets_init’, ‘register_my_custom_widget’);
This code hooks into the widgets_init action to register your custom widget.
Extending the WP_Widget class and implementing several methods to customize the widget’s appearance and behavior are required when creating a custom widget in WordPress.
You may make strong and adaptable widgets to improve your WordPress website by extending the class, adding the __construct (), widget (), form (), and update () methods, and registering the widget.
Before You Create a Custom Widget in WordPress
Your website’s functionality and user experience can be greatly improved by making a custom widget in WordPress. Little blocks known as widgets can be positioned in sidebars and footers, among other widget-ready sections of your website, to carry out particular tasks.
It’s crucial to comprehend the requirements and best practices before beginning the construction process to make sure your custom widget works well and interacts flawlessly with your WordPress website.
Before you begin, note the following:
1: Understand the Purpose of Your Widget
Before you begin coding, clearly define the purpose of your widget. Ask yourself the following questions:
- What problem will the widget solve?
- How will it enhance the user experience?
- Where on your site will this widget be displayed?
Having a clear goal will guide your development process and ensure the widget meets your needs and those of your visitors.
2: Familiarize Yourself with WordPress Widgets API
WordPress provides a Widgets API that allows developers to create custom widgets. Familiarizing yourself with this API is crucial. The API consists of several methods, including:
- Construct (): Sets up the widget’s name and description.
- Widget (): Outputs the widget content.
- Form (): Outputs the widget settings form in the admin area.
- Update (): Processes and saves the widget options.
Understanding how these methods work will help you structure your widget code effectively.
3: Know Basic PHP and WordPress Development
Creating a custom widget requires knowledge of PHP and the WordPress development environment. Ensure you are comfortable with:
- Writing and understanding PHP code.
- Navigating the WordPress file structure.
- Using WordPress functions and hooks.
If you’re new to WordPress development, consider studying the WordPress Codex and Developer Handbook.
4: Plan the Widget’s Features and Design
Outline the features and design of your widget. Consider the following:
- What data will the widget display or collect?
- How will users interact with the widget?
- What customization options will be available in the widget settings?
Sketching out a design or creating a wireframe can help visualize the final product.
5: Ensure Compatibility and Responsiveness
Your widget should be compatible with different themes and screen sizes. Test your widget on various devices to ensure it looks good and functions properly across all platforms. Using responsive design principles and testing tools can help achieve this.
6: Prepare for Security and Performance
Security and performance are critical aspects of any WordPress development. Follow these best practices:
- Sanitize and Validate Data: Ensure any data inputted by users is sanitized and validated to prevent security vulnerabilities.
- Optimize Performance: Minimize the widget’s impact on site performance by optimizing queries and reducing unnecessary code.
7: Test Your WordPress Widget Thoroughly
Before deploying your custom widget, thoroughly test it in different environments. Check for:
- Compatibility with various themes and plugins.
- Correct functionality across different browsers and devices.
- Proper handling of edge cases and user inputs.
8: Documentation and Support for Your Widget
Providing documentation for your widget will help users understand how to use it effectively. Include instructions on:
- Installing and activating the widget.
- Configuring widget settings.
- Troubleshooting common issues.
Creating a custom widget in WordPress can greatly enhance your site’s functionality and user experience. By understanding the purpose, familiarizing yourself with the Widgets API, and following best practices in development, security, and testing, you can build a robust and effective widget.
Thorough preparation and planning are key to ensuring your custom widget meets your goals and provides value to your site visitors.
Conclusion
In conclusion, let’s review the procedures for making your own unique WordPress widget:
Depending on your demands, you can add a specific function to your website using a WordPress custom widget. When you are unable to locate anything specifically that would satisfy your needs, this is a perfect answer. or when you wish to construct your website as a WordPress developer.
- Make a new class that is an extension of WP_Widget.
- To find the widget’s parameters, start with __construct ().
- To specify the widget’s front-end appearance, use widget ().
- To customize the appearance of the widget, add form ().
- Remember to include update () if you want the widget to reload after each modification.
- A WordPress custom widget can be registered by utilizing the add_action () function.
- Click Update File after copying and pasting the complete code to the functions.php file’s bottom.
- Navigate to the Widgets menu and drag the widget to its new location.
We hope that this article has made it easier for you to make a custom WordPress widget. See our articles on the differences between web hosting and domain names as well as our professional selections of the top free website hosting options.
Good Luck!
FAQS (Frequently Asked Questions)
1: What is a widget in the context of website development?
A widget, in website development, refers to a small block of content or functionality that can be added to specific areas of a webpage or website layout. Widgets are often used to display dynamic information, provide interactive features, or integrate third-party services seamlessly into a website.
Common examples include search bars, social media feeds, weather updates, and contact forms. They enhance user experience by offering useful functionalities without the need for extensive coding knowledge.
2: How can I create a custom widget for my website?
Creating a custom widget typically involves a few key steps:
- Planning and Design: Define the purpose and functionality of your widget. Sketch out its appearance and behavior.
- Coding: Use HTML, CSS, and JavaScript to build the widget. Ensure it is responsive and compatible with different browsers.
- Testing: Test the widget across various devices and browsers to ensure functionality and appearance consistency.
- Integration: Integrate the widget into your website’s framework or content management system (CMS) like WordPress, ensuring it fits seamlessly with your site’s design and layout.
Tools like jQuery or libraries/frameworks such as React or Angular can streamline the development process depending on complexity and interactivity requirements.
3: Can widgets be customized to match my website’s design?
Yes, widgets can and should be customized to align with your website’s overall design aesthetics and user experience goals. Customize the widget’s colors, typography, layout, and interactive elements to ensure consistency with your brand identity.
CSS styles can be applied to modify the appearance, while JavaScript can be used for interactive features like animations or user input validations.
4: Are there any best practices for creating effective widgets?
Effective widgets should be:
- Purposeful: Serve a specific function that enhances user experience or fulfills a need.
- User-Friendly: Intuitive and easy to use, with clear instructions or feedback.
- Responsive: Adapt seamlessly to different screen sizes and devices.
- Lightweight: Optimize performance by minimizing code bloat and unnecessary resources.
- Accessible: Ensure compatibility with accessibility standards (like ADA compliance) for all users.
Regularly update and maintain widgets to ensure they remain functional and compatible with evolving web technologies and standards.
5: How do I add a custom widget to a WordPress website?
To add a custom widget to a WordPress site:
- Develop the Widget: Create your widget using HTML, CSS, and PHP (if necessary for backend functionality).
- Create a Plugin: Wrap your widget code into a WordPress plugin. This allows for easy installation, activation, and deactivation without modifying the theme files directly.
- Upload and Activate: Upload the plugin to your WordPress site via the admin dashboard under Plugins > Add New > Upload Plugin. Activate the plugin once uploaded.
- Add Widget to Sidebar: Navigate to Appearance > Widgets in the WordPress admin area. Drag your custom widget from the Available Widgets section to the desired sidebar or widget area.
- Configure Settings: Customize the widget settings (if applicable) and save changes. Preview the widget on your website to ensure it displays correctly and functions as expected.
By following these steps and best practices, you can create and integrate custom widgets effectively into your website, enhancing its functionality and user engagement.
Read More: