Introduction
It may sound rather technical to manage DNS records, yet it is not as complicated as the majority of the people believe it to be. When you get used to it, it almost feels like turning settings on your phone; a couple of clicks and you are ready.
You may be hosting your site with ARZ Host, which is a lot easier because of something called cPanel.
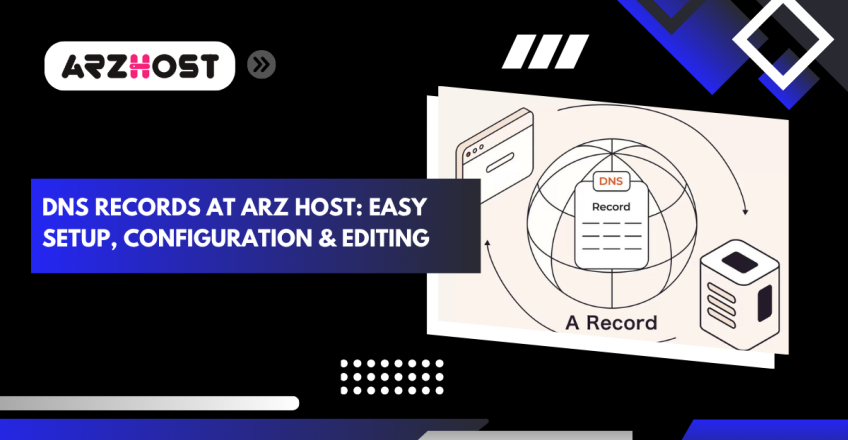
DNS Records at ARZ Host are like little instructions that explain to the internet where to send people when they type in your domain name on their browsers. If these records are not set up in the right manner, your website might just not show up, or emails might go missing. Nobody desires such a thing. It is very much like telling people the wrong directions to your home. This is very frustrating and irritating.
A record, CNAME and MX are terms that make people a bit nervous but they are merely labels describing the various types of directions. After you know what all of them do, adding or changing a record is not so bad. It is a matter of knowing where to click and what type of information to enter. And if you mess up? No problem, the majority of changes are relatively simple to repair.
DNS management allows your site to remain fast, reliable and easy to locate. Moreover, it will save you numerous headaches in the future when you will want to change servers, install email or connect your site with other services. It is the kind of thing that is absolutely worth knowing, even though you are not a big tech person.
What Are DNS Records: Defining Their Importance
DNS records are simply how the internet keeps a track of location of everything. Imagine it is a large telephone book. These records inform the internet where to go when one is typing the address of your site into his or her browser. And in their absence, browsing a web site would be like trying to locate a house without the signs of its address. You would be roaming in perpetuity.
They are tiny pieces of information, yet extremely vital. One wrong number or missing detail can suddenly cause your website or emails to stop working, which is not fun at all.
Common Types of DNS Records: Key Categories
The different types of DNS records are explained below:
A and AAAA Records
These are most likely to be the ones you will have to work on. A record directs your domain or subdomain to an IPv4 address (the standard IP address, such as 192.168.0.1).
AAAA records work exactly the same except on IPv6 addresses which are the long, letter-and-number addresses. Most of the time, you’ll just be dealing with A records unless your server is set up for IPv6, too.
CNAME Records
A CNAME is basically a nickname. It points one domain name to another instead of pointing to an IP address. This is handy in case you want alternate subdomains such as www or blog to redirect to your core site without the need to maintain a number of distinct records.
MX Records
MX records are all about email. They instruct the internet on where to send emails that are addressed to your domain. Therefore, when establishing a business email such as info@yourdomain.com, you need to have these configured properly, or your mails may simply be lost in the air.
TXT Records
TXT records are little bits of text you add for all kinds of reasons. Sometimes, they prove you own the domain, and sometimes, they’re for security stuff like SPF records (which help stop email spoofing). When you are configuring many third-party services, they will request you to add TXT records.
Why Managing DNS Is Crucial for Website Owners & How To Do It
Getting your DNS correct is like establishing a firm base of your house. And without it, all the other stuff you put on top of it becomes unsteady. An improper DNS configuration can actually result in your site not loading, your emails not arriving in your inbox, or your domain not working correctly with different services such as Google.
You do not have to play around with it daily but when you need to make adjustments, having the basics is quite useful. Also, the ability to solve small problems yourself rather than relying on technical support can literally come in handy particularly when you have a business or a project to be completed online.
Errors do occur, and that is not a problem. The positive side is that most DNS problems can be solved provided that you identify them at the earliest stage.
Accessing cPanel at ARZ Host
First things first, you need to get into your cPanel. When you first signed up you should have received a welcome email.
Read it correctly, as somewhere in it you will see your cPanel login link, username and password.
Open the cPanel login page on Google and write/paste your login credentials.
If you can’t find it, don’t panic, you can also log in through your ARZ Host client area.
Go to the ARZ Host website, Click on the Client Login Button (usually at the top right), enter your credentials and boom you’re inside.
From there, you should see a list of your hosting services. Click on the hosting plan you want to manage.
There will be a button that says, “Login to cPanel.” Click that, and you’ll be in.
Locating the DNS Management Tools
After you enter cPanel, it is not so difficult to find where you can handle your DNS settings.
Keep on scrolling down until you see the Domains section.
There you will find some stuff called Zone Editor (or you can simply enter zone editor in the search box on the right up top). That is the magic button you need.
When you click on Zone Editor a list of all your domains and subdomains opens.
Navigating the Zone Editor
On opening the Zone Editor, you will find it is quite simple and not so flashy. It is simply a list of all your domains having some buttons beside each. There are options like “Manage,” “Add Record,” and a few others, depending on what you need to do.
You don’t have to worry about touching everything. Most of the time, you’ll just be clicking “Manage” next to the domain you wanna work on. That’s where all the magic happens. It’s not overloaded with settings, either, which honestly makes life a lot easier.
Viewing All Domains and Their Associated DNS Records
After clicking on manage, you will be presented with a list of the entire DNS records associated with that domain. You will see A records, CNAMEs, and MX records and possibly a few others, depending on what is already configured.
It is like opening up a checklist. In each line, you can see the kind of record, the name such as your domain or subdomain, and where it is pointing. It may seem like a big mess when you have a lot of stuff in place, yet it is quite organized once you get used to it.
Look around a minute before you do anything. Before you start adding or editing it is good to know what is already there.
Filtering and Searching DNS Records by Type or Name
You can use the top search bar to go directly to a certain entry, such as your A records or perhaps only the TXT records. You may enter a domain name, or filter record type. This seems much easier and quicker, particularly when you are working with a more noticeable site that has numerous settings around.
And all you need to do is type a little of the name or select a record type in the drop-down and the Zone Editor will focus on that. Spares you a scroll-to-lasting.
Tiny hint: never forget to check that you are making amendments to the right record. You can confuse those that look like each other when you are going too quickly.
Managing DNS Records: Step-by-Step Guide
Managing DNS records may seem to be a scary thing, but after getting used to it, it will begin to make sense. You can add a new record, make corrections to an old record, and clear up what you do not need anymore; the steps are not that difficult.
Simply take care, a single faulty shift can disorient your site or email momentarily. No pressure though, since most errors are easy to remedy provided one notices them early on.
Let’s go through the basics.
Adding DNS Records: Configuring New Entries
Need to add something new, like pointing your domain to a new server or setting up email? Here’s how:
- Open the Zone Editor and select Manage next to your domain.
- In the top right, press the + Add Record button.
- Select the kind of the record you wish to add (A, CNAME, MX, TXT, any kind you require).
- Fill out the fields:
- Zone Name: This is normally your domain or subdomain (such as www, mail, and so on).
- Type: Choose in the drop-down such as A, MX, TXT, etc.
- TTL: Keep it at the default value, unless you are quite certain of what you are doing.
- Value: IP address, server name or text you are connecting to.
- Click Save Record and you are finished!
A small hint here is that DNS additions may take time to propagate everywhere and that when they fail to work right away, it is not necessarily because the operation is not going on.
Editing DNS Records: Modifying Existing Settings
There are times when you do not need to create a new record; you just have to modify an existing record. Perhaps you have changed your IP address of your server or you are changing email provider.
Here’s how to do it:
- Log in to the Zone Editor and press Manage beside your domain.
- Locate the record to be edited.
- Click the Edit button (little pencil icon typically).
- Edit any info you have to change, name, type, value, and whatever.
- Save your changes.
Tip: Never forget to verify the new information prior to hitting save. One mistake may ruin your site or email, so it is worth an extra minute.
Deleting DNS Records: Removing Unnecessary Records
At times, you will find some old records around that you certainly do not need any more.
Maybe it is an old email service you no longer use or a subdomain you shut down. Here’s how to clean them up safely:
- Again, go into the Zone Editor and hit Manage next to your domain.
- Find the record you want to get rid of.
- Click Delete (you will find a trace can icon most of the time).
- Ensure that you are about to erase it.
aution: destroying DNS records may create havoc unless you are 100 percent certain of their contents. In doubt, it is better to leave it, or to check it out the second time.

Best Practices for DNS Management: Ensuring Accuracy and Reliability
When you get used to making changes in DNS, it is easy to take the leap and start making changes whenever you have to. But there are a few clever habits which will keep you out of a lot of needless headaches in the future.
DNS could be such a straightforward thing when everything is functioning but when something goes wrong it can be time consuming to correct. A small amount of care at the beginning can go a long way. The following are just some of the points to remember.
Backup Before Making Changes
It is advisable to store up your current DNS settings at a backup file before you do anything. On some hosting panels, one can simply press the “export” button, but even making a screenshot or simply copying everything into a file in Notepad is sufficient.
By that means, in case you make a mistake or you lose the idea that you have modified something, you can always get everything back to the state it was in the beginning. It is like having a safety net.
Double-Check for Accuracy
Typos happen. When you are adding or editing a record it is so easy to miss a number or to type the wrong domain name. It is best to recheck the information before you hit save. Take a close notice of IP addresses, domain names, TTL values, all.
It is quick, just a few seconds and it can save you some hours of troubleshooting in the future.
Regularly Review DNS Settings
In the long term you may wind up with old DNS records lying around that you no longer need. Perhaps you switched hosting, closed an email service or migrated to another platform.
It is advisable to review your DNS records every now and then and delete those you are not using. There is nothing so simple about old records and in fact, there are also some odd issues that you were not expecting to arise because of them.
Conclusion: Optimizing DNS Management for Seamless Website Operations
You may find it a little daunting the first time you log into ARZ Host to manage your DNS records, but the truth is, it is not difficult. After getting used to the placement of everything, it all begins to lock into place. It is simply a matter of being a bit cautious, checking twice what you are performing and not being in a hurry about it.
The addition, deletion or editing of records are mostly very manageable once you understand the basic concept of the task. And the Zone Editor is not that bad either, you are not combing through endless menu choices or puzzling interfaces. Everything is right there before your eyes.
The only big thing is to be organized. Before you begin editing stuff, save your records, proofread (all of us do make typing mistakes), and occasionally, review your settings to clear out anything outdated or faded. It’s like cleaning up your desk–it might be a little tedious, but you will be glad you did it when all the machinery is running smoothly.
And keep in mind, there may be a moment when you feel lost or feel stuck but it is completely ok to seek assistance. One can always do it right and take slow steps as opposed to rushing and creating a bigger headache in future.
Frequently Asked Questions
Is it possible to administer DNS when my domain is registered with another?
Yes, you sure can. Even if your domain is registered with a different company, you can still manage the DNS from your hosting account at ARZ Host. You just need to point your domain’s nameservers to ARZ Host first. After that, all the DNS settings can be handled right inside cPanel. It’s pretty straightforward once the nameservers are switched over.
Who to contact at ARZ Host for support?
In case of any trouble, the ARZ Host support team is fast and reacts promptly. You may open a support ticket in your client area, or you may email them directly. Live-chat 24/7 is available to urgent stuff. A clear explanation and a possible screen shot is always welcome to enable them to assist you more quickly.
What is the time lag of DNS changes?
Most changes begin to work very quickly, such as in a few minutes. Nevertheless, full propagation over the internet can occasionally take as long as 24-48 hours, depending on your location, as well as what has changed. When it is taking more than two days, that can be a sign there is some problem, and you should recheck your settings.
What will occur when I make an error in a DNS record?
Don’t panic. Seriously. The majority of errors can be sorted easily provided that you detect them in time. When something fails to work, you may either manually correct the record or recover it assuming you have a backup (that is why before doing anything, it is always good to make a copy). ARZ Host support can most likely assist you to figure it out fairly quickly.
Do I need to adjust the TTL value?
Normally you only need to leave TTL at the default unless you are told by someone to change it. Reduced TTLs such as 300 seconds implies that changes propagate more quickly, useful in migrations.
However, default is perfectly okay when it comes to the mundane, and you really do not have to be concerned about it.
Can I undo a deleted DNS record?
Yes, sort of. Only that you know what it was. When you decide to delete a record it is no longer in the list. And unless you have written it down somewhere or have a backup, you will be forced to recreate it by hand. This is the reason why it is prudent to always create a quick backup or have a screenshot of what is on your screen when you begin deleting something.
Latest Posts: