
Introduction: Setting Up Out-of-Office Replies in Outlook Web
Setting an “Out of Office” (OOO) reply in Outlook Web is an essential task when you need to inform colleagues, clients, or anyone else trying to contact you that you are unavailable.
Whether you’re going on vacation, attending a conference, or simply need time away from your email, an automatic out-of-office message can maintain communication without leaving senders wondering why they’re not getting a response.
This comprehensive guide will walk you through the steps to Set Out of Office in Outlook Web. For more Guides Check out the Resources & Blogs of ARZ Host.
Why Set Out of Office in Outlook Web?
Setting an out-of-office (OOO) reply is a crucial aspect of managing professional communication, especially when you are unavailable for an extended period.
Here’s why it’s important:
1: Maintaining Professionalism with Out-of-Office Messages
An out-of-office reply ensures that anyone trying to reach you is informed of your absence. This demonstrates professionalism, showing that you value communication and are considerate of others’ time and expectations.
2: Managing Expectations with Automatic Replies
By setting an OOO reply, you manage the expectations of colleagues, clients, or partners. They will know when you’ll be back and can plan accordingly, rather than waiting indefinitely for a response.
3: Avoiding Missed Opportunities Using Out-of-Office Notifications
Without an OOO reply, important emails might go unanswered, leading to missed opportunities. Whether it’s a business deal, a client query, or an urgent issue, an automated reply can provide alternative contacts or a timeframe for your return.
4: Enhancing Work-Life Balance with Automatic Replies
Setting an OOO reply allows you to disconnect and focus on your time off without feeling the need to check emails constantly. It communicates your absence clearly, giving you peace of mind and helping maintain a healthy work-life balance.
5: Providing Important Information through Out-of-Office Messages
An OOO reply can include vital information such as alternative contacts, emergency procedures, or instructions on what to do in your absence. This helps ensure that work continues smoothly even when you’re not around.
Setting an out-of-office reply is a simple yet effective way to maintain professionalism, manage expectations, and ensure smooth communication during your absence. For tips on choosing the best tools for managing your email and more, check out our guide on Best Email Service Providers (ESP).
Steps to Set Up an Out-of-Office Reply in Outlook Web:
Here’s the step-by-step guide for setting up an out-of-office reply in Outlook Web.
1: Log in to Outlook Web Access
To start, you need to log in to your Outlook Web account.
Open your preferred web browser and type in the URL https://outlook.office.com/. You’ll be directed to the Microsoft Outlook sign-in page.
Enter your email address associated with your Outlook account and click “Next.” You’ll then be prompted to enter your password.
After entering the correct password, click “Sign In.”
If you have two-factor authentication enabled, you may need to enter a code sent to your phone or email. Once logged in, you’ll be taken to your Outlook Web inbox, where you can access your emails, calendar, and other features.
Ensure you have a stable internet connection to avoid any interruptions during the login process.
If you’re using a shared or public computer, remember to sign out when you’re finished to protect your account.
2: Access the Outlook Web Settings Menu
After logging in, you’ll find the settings icon, represented by a gear symbol, in the top-right corner of the Outlook Web interface.
Click on this icon to access the settings menu. A sidebar will appear on the right-hand side, providing quick access to some of the most common settings.
Scroll down to the bottom of this sidebar, and you’ll see an option labeled “View all Outlook settings.” Click on this option to open the full settings menu.
This menu is divided into several sections, such as “Mail,” “Calendar,” and “People.”
For setting up an out-of-office reply, you’ll primarily be working within the “Mail” section. The settings menu is organized into categories to help you easily navigate and customize your Outlook Web experience.
Familiarize yourself with these settings to make the most out of Outlook Web. To learn more about effectively promoting your website, check out our guide on The Best Way to Advertise Your Website.
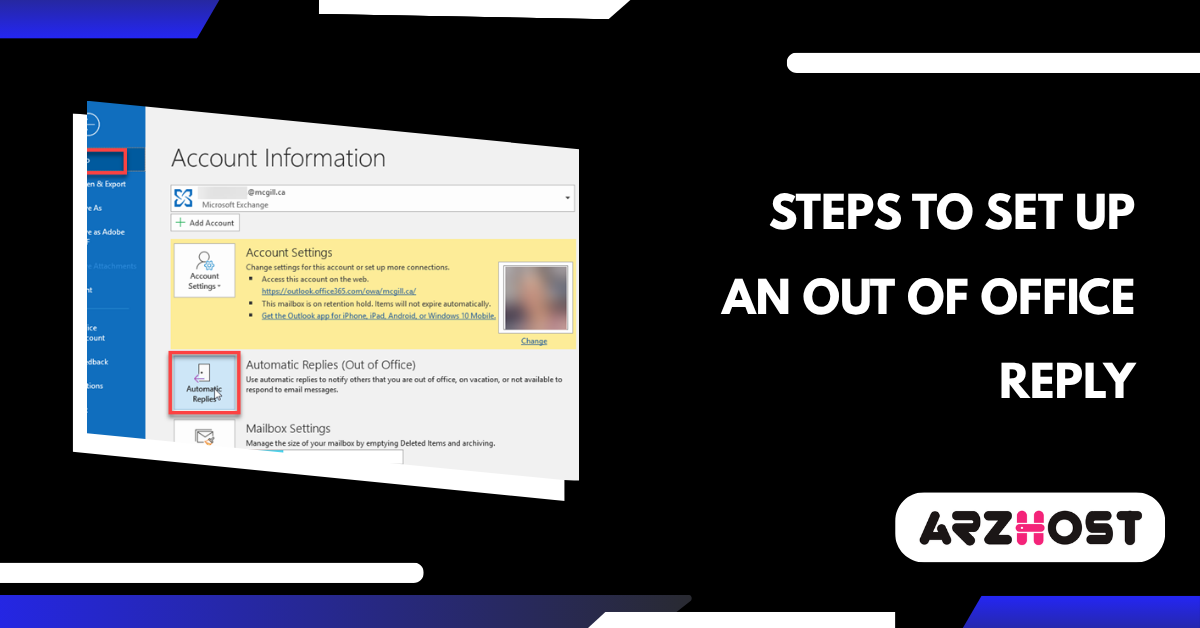
3: Navigate to Automatic Replies Settings
Once you’re in the full settings menu, focus on the “Mail” section. Under this section, you’ll see various options related to your email settings.
Look for the option labeled “Automatic replies” in the list. This is where you’ll set up your out-of-office message. Click on “Automatic replies,” and a new window will open, allowing you to configure your automatic replies.
This feature is designed to send out a pre-written message to anyone who emails you while you’re away, letting them know that you’re out of the office and when they can expect a response.
The automatic replies feature is particularly useful for ensuring that your contacts are informed of your absence, helping to manage their expectations regarding your availability.
4: Turn On Automatic Replies in Outlook Web
In the “Automatic replies” section, you’ll see a toggle switch to turn on automatic replies.
Click on the toggle to enable this feature.
Once turned on, you’ll have access to additional options for customizing your out-of-office message.
You can choose to set a time range during which automatic replies will be active. If you don’t set a time range, the automatic replies will remain active until you manually turn them off.
Additionally, you can decide whether to send replies only to people within your organization or to everyone who emails you.
These options allow you to tailor the out-of-office response to suit your specific needs, whether you’re away for a short period or an extended vacation.
5: Craft Your Out-of-Office Message Effectively
Now that automatic replies are turned on, it’s time to write your out-of-office message.
In the text box provided, you can type out a message that will be automatically sent to anyone who emails you while you’re away.
It’s important to be clear and concise in your message. Typically, an out-of-office message includes the dates you’ll be unavailable, the reason for your absence (optional), and any alternative contacts if urgent assistance is needed.
For example: “Thank you for your email. I am currently out of the office and will return on [Date]. If you require immediate assistance, please contact [Alternative Contact]. I will respond to your email upon my return.”
Customizing your message to your specific situation ensures that your contacts receive the information they need. To explore more strategies for enhancing your business through effective content marketing, check out our guide on Content Marketing Strategy to Grow Your Business
6: Customize Additional Settings for Out-of-Office Replies (Optional)
Outlook Web also offers additional settings that you can customize when setting up your automatic replies.
For example, you can choose to block your calendar during the period when you’re out of the office, preventing others from scheduling meetings with you.
You can also set up different messages for people inside and outside your organization.
This is useful if you want to provide more detailed information to your colleagues while keeping your message to external contacts more general.
Additionally, you can choose to send replies only to people in your contact list, which helps filter out unnecessary responses to unknown senders.
These optional settings provide further control over how your out-of-office replies are managed, allowing you to fine-tune your communication while you’re away.
7: Save Your Out-of-Office Settings
After you’ve configured your automatic replies and customized any additional settings, the final step is to save your changes.
At the bottom of the “Automatic replies” window, you’ll find a “Save” button. Click on this button to apply your settings.
Once saved, your out-of-office replies will be activated according to the parameters you’ve set. If you choose to set a time range, the replies will automatically start and stop at the designated times.
If not, remember to manually turn off the automatic replies when you return to avoid sending out-of-date messages.
Saving your settings ensures that your out-of-office response is properly configured, providing peace of mind that your contacts are informed while you’re away.
Best Practices for Out-of-Office Replies
- Keep It Professional: Your out-of-office message reflects your professionalism. Keep it clear, concise, and courteous.
- Specify Alternative Contacts: Always provide an alternative contact person for urgent matters to ensure that business operations continue smoothly in your absence.
- Test Your Settings: Send yourself an email after setting up your out-of-office reply to ensure it’s working as intended.
Conclusion
Setting up an out-of-office reply in Outlook Web is a straightforward process that can greatly enhance your communication strategy.
By following the steps outlined in this tutorial, you can ensure that your contacts are informed of your absence and that they know when to expect a response.
Remember to customize your message to fit your needs and to update it whenever your availability changes.
Whether you’re taking a much-needed break or attending an important event, your out-of-office reply will help you manage your inbox while you’re away, keeping everything running smoothly. For reliable and efficient web hosting solutions, check out ARZ Host, where we offer a range of services including web hosting, VPS, and more to keep your online presence in top shape.
FAQs (Frequently Asked Questions)
1: How do I access the Out of Office settings in Outlook Web?
To access the Out of Office settings in Outlook Web, start by logging into your Outlook Web account using a web browser.
Once you’re in your inbox, click on the gear icon (⚙️) located in the upper-right corner to open the settings menu. In the settings pane, click on “View all Outlook settings” at the bottom.
Under the “Mail” tab, select “Automatic replies.” Here, you can enable and customize your Out of Office message.
2: Can I schedule my out-of-office replies for specific dates in Outlook Web?
Yes, you can schedule your Out of Office replies for specific dates in Outlook Web. In the “Automatic replies” section, after enabling automatic replies, check the box that says “Send replies only during this time.”
You can then set a start date and time as well as an end date and time. This way, your Out of Office message will automatically activate and deactivate according to the schedule you’ve set.
3: Is it possible to send different Office messages to people inside and outside my organization?
Yes, Outlook Web allows you to send different Office messages to people inside and outside your organization. In the “Automatic replies” settings, after enabling automatic replies, you’ll see two separate sections: one for “Inside my organization” and another for “Outside my organization.” You can write a customized message for each group.
This feature is useful for providing more detailed instructions to internal colleagues while giving a simpler or more general message to external contacts.
4: What happens if I forget to turn off the Out of Office reply in Outlook Web?
If you forget to turn off the Out of Office reply in Outlook Web and haven’t set an end date and time, the automatic replies will continue to be sent indefinitely.
To avoid this, it’s recommended to either set a specific end date and time when scheduling your out-of-office reply or manually turn off the automatic replies by revisiting the “Automatic replies” settings and selecting the option “Don’t send automatic replies.”
5: Can I include a personalized signature in my out-of-office reply on Outlook Web?
Yes, you can include a personalized signature in your out-of-office reply on Outlook Web. When composing your automatic reply in the “Automatic replies” settings, you can manually type your signature at the end of your message.
Alternatively, you can copy and paste your regular email signature from your Outlook Web email settings if you wish to maintain consistency with your standard communications.
6: Will my Office reply be sent multiple times to the same person in Outlook Web?
Outlook Web is designed to send your Out of Office reply only once to each sender for the duration of your absence. This means that even if a person sends you multiple emails while your automatic reply is active, they will only receive your Office message the first time.
This feature helps prevent overwhelming the sender with repeated notifications and keeps your communications more professional and streamlined.
Read More: