Introduction to HP Printer’s Scan-to-Email Feature: Overview and Importance
Scanning documents directly to email from an HP printer is a convenient and efficient way to share files quickly. Whether you’re in an office setting or working from home, this feature can save you time and streamline your workflow.
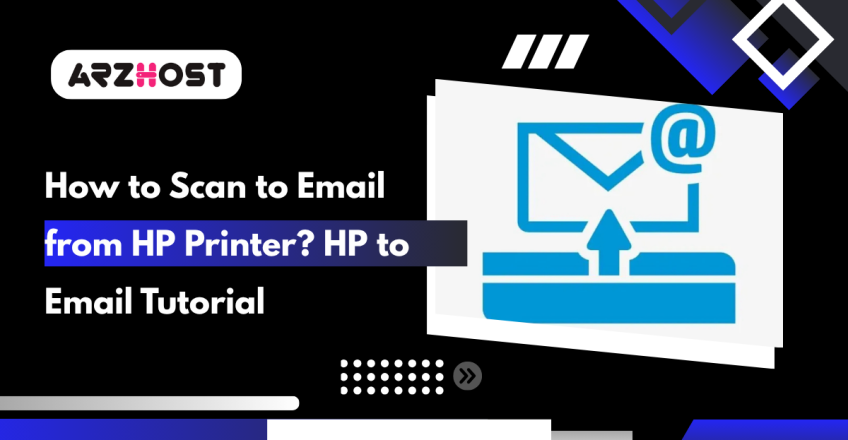
The Scan to Email from HP Printer feature allows you to scan a document or photo and send it directly to an email address from your HP printer.
This eliminates the need to scan a document to your computer and then manually attach it to an email. The feature is particularly useful in professional environments where document sharing is frequent. Read More articles on our Blog page.
Key Benefits of Using Scan-to-Email on Your HP Printer
- Time Efficiency: Send documents directly from the printer to the recipient’s inbox.
- Simplified Process: Reduces steps by combining scanning and emailing into one action.
- Versatility: Supports various file formats such as PDF, JPEG, and TIFF.
In this guide, we’ll walk you through the step-by-step process of setting up and using the scan-to-email function on your HP printer.
How to Prepare Your HP Printer for the Scan-to-Email Feature
To prepare your HP printer for the Scan-to-Email function, follow these steps to ensure that your device is properly configured and ready to send scanned documents via email.
1: Connect Your Printer to a Network for Seamless Email Functionality
- Wired or Wireless Connection: Ensure your HP printer is connected to the same network as the computer or mobile device you’ll be using. You can connect via Ethernet for a wired connection or use Wi-Fi for a wireless setup. To connect via Wi-Fi, navigate to the printer’s control panel, select the Wi-Fi setup wizard, and follow the on-screen instructions to join your network.
- Check Connection Status: Verify the connection by printing a network configuration page from your printer’s control panel. The page will show the connection status and IP address, confirming that your printer is properly connected to the network.
2: Set Up the Email Profile on Your Printer for Quick Email Sending
- Access the Embedded Web Server (EWS): Open a web browser on a device connected to the same network as your printer. Enter your printer’s IP address into the address bar to access the EWS.
- Navigate to the Scan-to-Email Setup: In the EWS, go to the “Scan” tab, and then select “Scan-to-Email” from the options. Click on the “Outgoing Email Profiles” option.
- Create a New Email Profile: Select “Add” to create a new email profile. Enter the required details, such as the email address, display name, and SMTP server settings (these are typically provided by your email service provider). If your email provider requires it, enable SMTP authentication and input the necessary credentials.
- Test the Email Profile: After entering the details, use the “Test” option to ensure the configuration is correct. The printer will send a test email to verify the settings.
3: Configure Scan Settings for Optimal Scan Quality and Efficiency
- Choose Default Scan Settings: In the EWS, under the “Scan” tab, configure the default scan settings, such as resolution, file format (e.g., PDF, JPEG), and color options. These settings can be adjusted later directly from the printer’s control panel if needed.
- Set File Size Limits: Depending on your email provider, there may be a file size limit for attachments. Set a file size limit in the EWS to ensure that scanned documents are not too large to be emailed.
4: Add Email Addresses to the Address Book for Easy Access
- Manage the Address Book: To streamline the scan-to-email process, add frequently used email addresses to the printer’s address book. This can be done in the EWS under the “Scan” tab, by selecting “Address Book” and adding new contacts.
- Import Contacts: If you have a large list of contacts, you may be able to import them directly from a CSV file, depending on your printer model.
5: Test the Scan-to-Email Function to Ensure Proper Configuration
- Perform a Test Scan: Place a document on the scanner glass or in the automatic document feeder (ADF). Access the Scan-to-Email function from the printer’s control panel, select a recipient from the address book, or manually enter an email address. Choose your scan settings and start the scan.
- Verify Delivery: Check the recipient’s inbox to confirm that the email was sent successfully and that the scanned document is attached.
By following these steps, your HP printer should be fully prepared for the Scan-to-Email function, allowing you to efficiently scan and send documents directly from your device. See our Best Email Service Providers (ESP) for your Business and work.
How Do You Set Up the Scan-to-Email Feature on Your HP Printer?
Setting up scan-to-email on your HP printer involves configuring your printer to send scanned documents directly to an email address. This setup is particularly useful for offices and businesses that need to quickly share documents digitally.
Here’s a step-by-step guide to help you set up scan-to-email on your HP printer:
Step 1: Prepare Your Email Account Information for Configuration
Before you start, gather the following information related to your email account:
- SMTP server address: This is the server your email service uses to send emails. You can find this information in your email client settings or by searching online.
- SMTP port number: The port used by the SMTP server (typically 25, 465, or 587).
- Email address and password: The email address you want to use to send scanned documents and its associated password.
Step 2: Access the HP Embedded Web Server (EWS) for Advanced Settings
- Ensure your HP printer is connected to your network (either wired or wireless).
- Find the IP address of your printer. You can usually find this on the printer’s control panel under the network settings menu.
- Open a web browser on your computer and enter the IP address of your printer in the address bar. Press Enter to access the HP Embedded Web Server.
Step 3: Configure Scan-to-Email Settings for Accurate Functionality
1: In the HP Embedded Web Server (EWS), navigate to the Scan or Web Services tab, depending on your printer model.
2: Look for the Scan-to-Email setup or configuration option and click on it.
3: Enter the following information:
- SMTP Server Address: Enter the SMTP server address of your email provider.
- SMTP Port Number: Enter the SMTP port number.
- Authentication: If required, enable authentication and enter your email address and password.
- Sender Email Address: This is the email address that will appear as the sender when you scan documents.
4: Save the settings once you’ve entered all the necessary information.
Step 4: Test the Scan-to-Email Configuration to Verify Setup
- Go to your HP printer’s control panel.
- Select the Scan option, then choose Email or Scan-to-Email.
- Enter a test email address (you can use your email) and initiate a scan.
- If the setup is correct, the scanned document should be sent to the specified email address.
Step 5: Troubleshooting Common Setup Issues with Scan-to-Email
If the scan-to-email setup fails, consider the following:
- Check SMTP Server Details: Ensure that the SMTP server address and port number are correct.
- Check Network Connection: Verify that your printer is connected to the internet and can communicate with the SMTP server.
- Authentication Issues: If you’re using a Gmail or similar service, you may need to enable “Less secure apps” in your email account settings to allow the printer to send emails.
Once you’ve successfully set up scan-to-email, you can easily send scanned documents directly from your HP printer to any email address, making document sharing more efficient. Check out The Best Email Marketing Tools to Grow Your Business.
Step-by-Step Guide to Scanning a Document to Email Using Your HP Printer
Once the setup is complete, you can start scanning documents and sending them via email directly from your HP printer.
Step 1: Place the Document on the Scanner for Accurate Scanning
- Load the Document: Place the document you wish to scan on the scanner glass or in the automatic document feeder (ADF), if your printer has one.
- Select Scan-to-Email: From the printer’s home screen, choose “Scan” and then select “Email.”
Step 2: Enter the Recipient’s Email Address Correctly for Delivery
- Manual Entry or Address Book: Enter the recipient’s email address manually or select it from your address book if it’s saved.
- Subject and Body: You can also add a subject line and message body for the email, although these fields are usually optional.
Step 3: Choose the Appropriate File Format and Resolution for the Scan
- Select File Format: Choose the file format for the scanned document (e.g., PDF, JPEG, TIFF).
- Adjust Resolution: If needed, adjust the resolution settings. Higher resolutions result in clearer scans but larger file sizes.
Step 4: Send the Scan to Complete the Process
- Start Scanning: Press “Start” or “Scan” to begin the scanning process.
- Email Sent Confirmation: Once the scan is complete, the printer will automatically send the document to the specified email address. You should receive a confirmation message on the printer’s display.
Common Issues Encountered with the Scan-to-Email Feature
Even with the correct setup, you may encounter some issues when using the scan-to-email feature.
Here are some common problems and their solutions:
Issue 1: Scan-to-Email Not Sending – Causes and Fixes
- Check SMTP Settings: Ensure the SMTP server settings are correct. A misconfiguration can prevent the email from being sent.
- Network Connection: Verify that the printer is connected to the network and has internet access.
Issue 2: Poor Scan Quality – Adjusting Settings for Better Results
- Resolution Settings: If scans are blurry or unclear, increase the resolution setting.
- Scanner Glass Cleaning: Clean the scanner glass and ADF to remove any smudges or dust.
Issue 3: Email Delivery Delays – Troubleshooting Slow Email Sending
- Email Provider Limits: Some email providers limit the size of attachments. If your scan exceeds this limit, consider reducing the resolution or splitting the document into multiple parts.
- Check Spam Folder: If the recipient doesn’t receive the email, ask them to check their spam or junk folder.
Best Practices for Effectively Using the Scan-to-Email Function
To make the most of your HP printer’s scan-to-email feature, consider these best practices:
Regularly Update Printer Firmware to Ensure Optimal Performance
Keeping your printer’s firmware up to date ensures compatibility with the latest network protocols and security features.
Secure Your Email Setup for Safe and Reliable Communication
Use strong passwords for your email accounts and enable two-factor authentication (2FA) if available to protect against unauthorized access.
Organize Your Address Book for Quick and Easy Access
Save frequently used email addresses in your printer’s address book to save time and reduce the risk of entering incorrect email addresses.
Monitor Email Deliverability to Ensure Successful Scanning
Keep an eye on the deliverability of your scanned emails. If you notice a pattern of delivery issues, revisit your SMTP settings or consult your IT support.
Check out our Email Automation Beginners Guide to understand how it works and how it can help your business to grow.
Conclusion: Optimizing Your HP Printer’s Scan-to-Email Function for Efficiency
An effective solution that makes document management easier and boosts productivity is scanning to email from an HP printer. If you follow this tutorial, you should be able to configure and use the scan-to-email feature, which will enable you to share scanned documents quickly and effectively.
Whether scanning bills, contracts, or private documents, this capability can streamline and improve the effectiveness of your operation. For additional helpful resources and cheap but reliable Hosting Services, visit ARZ Host
FAQs (Frequently Asked Questions)
1: How Do I Set Up My HP Printer to Scan to Email?
To set up your HP printer to scan to email, you need to first configure the email settings on the printer. Here’s how:
- Access the printer’s control panel and navigate to the “Setup” or “Settings” menu. Look for “Email Setup” or “Scan to Email Setup.”
- Enter the required SMTP server settings, which include the server address, port number, and encryption method (SSL/TLS). You can obtain these details from your email service provider (e.g., Gmail, Outlook).
- Enter your email address and password. This is the email account that will be used to send the scanned documents.
- Configure any additional settings, such as the default sender name and email subject.
- Save your settings and exit the menu. Your HP printer is now set up to scan to email.
After setup, you can easily scan and send documents directly from the printer by selecting the “Scan to Email” option on the control panel.
2: What Are the SMTP Server Settings Required for Scanning to Email?
The SMTP (Simple Mail Transfer Protocol) server settings are essential for enabling your HP printer to send scanned documents via email. These settings vary depending on your email provider:
Gmail:
- SMTP Server: smtp.gmail.com
- Port: 465 (SSL) or 587 (TLS)
- Encryption: SSL or TLS
- Username: Your full Gmail address (e.g., example@gmail.com)
- Password: Your Gmail password or app-specific password if two-factor authentication is enabled.
Outlook/Office 365:
- SMTP Server: smtp.office365.com
- Port: 587 (TLS)
- Encryption: TLS
- Username: Your full Outlook address (e.g., example@outlook.com)
- Password: Your Outlook password.
Yahoo Mail:
- SMTP Server: smtp.mail.yahoo.com
- Port: 465 (SSL) or 587 (TLS)
- Encryption: SSL or TLS
- Username: Your full Yahoo address (e.g., example@yahoo.com)
- Password: Your Yahoo Mail password.
Ensure that you use the correct settings for your specific email provider. These settings allow the HP printer to connect to the email server and send scanned documents.
3: How Do I Scan and Send a Document via Email from My HP Printer?
Scanning and sending a document via email from your HP printer is straightforward once the setup is complete:
- Place the document you want to scan on the scanner glass or in the automatic document feeder (ADF), depending on your printer model.
- On the printer’s control panel, select the “Scan” option.
- Choose “Scan to Email” from the list of options.
- If prompted, select the email address you want to use (if multiple accounts are set up) and enter the recipient’s email address.
- Choose the desired scan settings, such as file format (PDF, JPEG, etc.), resolution, and color options.
- Start the scan. The document will be scanned and automatically attached to an email.
- Review the email and make any necessary changes to the subject or message body.
- Send the email directly from the printer.
The document will be sent to the recipient’s email address as an attachment.
4: What Should I Do If My HP Printer Fails to Send Emails?
If your HP printer fails to send emails, several issues could be at play. Here are some troubleshooting steps:
- Check SMTP Settings: Ensure that the SMTP server settings are correctly configured, including the server address, port, and encryption method.
- Verify Email Credentials: Double-check that your email address and password are entered correctly. If you’ve recently changed your email password, update it in the printer’s settings.
- Network Connection: Make sure your printer is connected to the internet. A weak or disconnected network can prevent emails from being sent.
- Firewall or Security Software: Sometimes, security software or firewalls can block outgoing emails. Check your router or network security settings to ensure they aren’t blocking the printer’s email function.
- Two-Factor Authentication: If your email account uses two-factor authentication (2FA), you may need to create an app-specific password for the printer. Use this password instead of your regular email password.
- Printer Firmware: Ensure that your printer’s firmware is up to date. Outdated firmware can cause compatibility issues with email servers.
If the problem persists, consult the HP support website or contact customer service for further assistance.
5: Can I Use a Different Email Address for Each Scan to Email Task?
Yes, you can use a different email address for each scan to email task on most HP printers. During the “Scan to Email” process, the printer may prompt you to enter the sender’s email address. This allows you to send the scanned document from any email account you have access to.
To do this:
- Start the “Scan to Email” process as usual.
- When prompted, enter the desired sender’s email address instead of the default address.
- Provide the corresponding email password and complete the scan.
This flexibility is useful if you need to send documents from different email addresses depending on the context or recipient.
6: Is It Possible to Scan Multiple Pages into a Single Email Attachment?
Yes, you can scan multiple pages into a single email attachment using your HP printer. This feature is especially useful when scanning multi-page documents. Here’s how:
Step 1: Place the entire document in the automatic document feeder (ADF) or scan each page individually on the scanner glass.
Step 2: Start the “Scan to Email” process from the printer’s control panel.
Step 3: As you scan each page, the printer will automatically compile them into a single file. Ensure that the file format you select (e.g., PDF) supports multiple pages.
Step 4: Once all pages are scanned, the printer will attach the compiled document to the email.
Step 5: Review and send the email.
This process ensures that all scanned pages are included in a single attachment, making it convenient for recipients to view the entire document at once.
Read More: